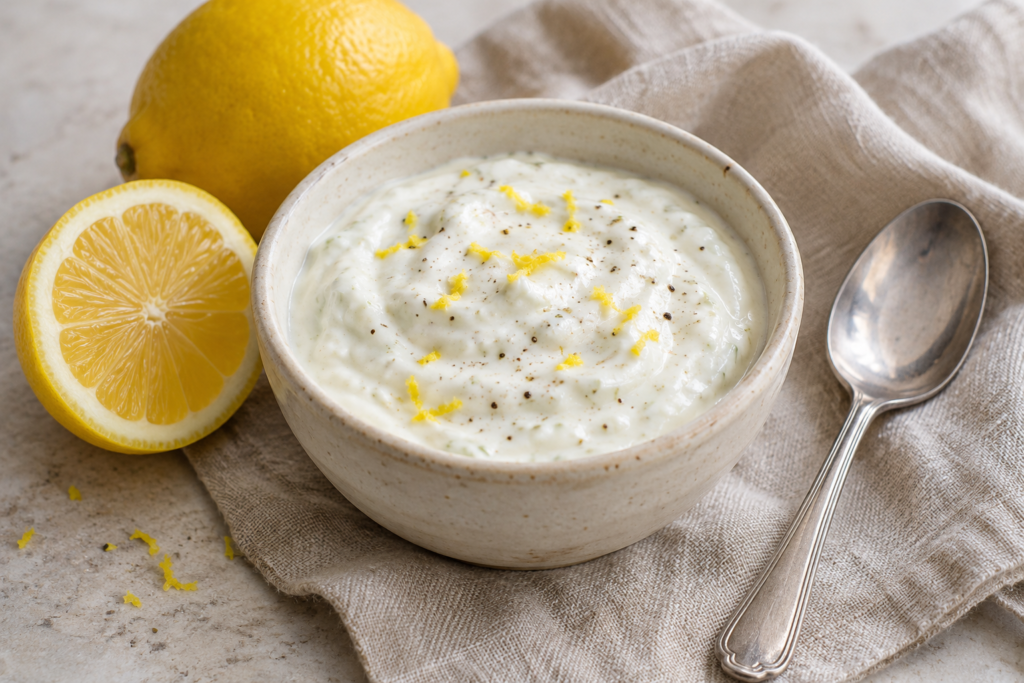
To make lemon yogurt sauce without garlic, stir plain Greek yogurt with lemon zest, a measured spoonful of lemon juice, a little olive oil, salt and pepper. Keep it thick for spooning, or add water a teaspoon at a time for a drizzle.
The trick is to decide how much lemon flavour you want before thinning the sauce. Zest adds citrus aroma; juice adds tartness as well as liquid. Using both lets you adjust the sauce without pouring in half a lemon and hoping for the best.
Recipe development note: this original recipe has not been independently kitchen-tested. Preparation time and yield are estimates. Yogurt brands vary, so the final seasoning and consistency need a small tasting adjustment.
Ingredients for one small bowl
- ½ cup (about 120 g) plain Greek yogurt made with pasteurized milk
- 1 teaspoon fresh lemon juice, plus more to taste
- ¼ teaspoon finely grated lemon zest, yellow part only
- 1 teaspoon olive oil
- ⅛ teaspoon fine salt, then adjust after tasting
- A small pinch of black pepper
- Cold drinking water, 1 teaspoon at a time, only if needed
Estimated prep: 5–8 minutes. Cooking: none. Estimated yield: a little over ½ cup, enough for about 4 small portions. You need a bowl, spoon, measuring spoons and a fine grater.
There is no garlic or onion in this base. That describes the ingredients; it is not a claim that the sauce suits every medical diet or allergy. Dairy yogurt contains milk. Check the labels of any substitutions you use.
Start with the right yogurt
Choose plain, unsweetened yogurt. Vanilla yogurt can look almost identical in the tub but gives a different result in a savoury sauce. Taste a little of the yogurt first so you know how tangy the starting point is.
Thick Greek yogurt gives you more control: it is easy to loosen a spoonful, but much harder to thicken a whole bowl after adding too much liquid. Full-fat yogurt gives a richer mouthfeel; a lower-fat plain Greek yogurt can also be used. Thickness varies by product, not just fat percentage.
Regular plain yogurt is an option if you want a looser sauce. Begin with no extra water. If the tub has a little separated liquid, stir the yogurt before measuring so your batch starts evenly mixed.
Mix and adjust
- Prepare the lemon. Wash it under running water and dry it before zesting. The FDA advises washing produce before peeling or cutting; use clean hands and utensils. Grate only the yellow surface, avoiding the bitter white pith.
- Make the base. Stir the measured yogurt, lemon zest, 1 teaspoon lemon juice, olive oil, salt and pepper together until evenly combined. Scrape the sides and bottom of the bowl.
- Taste with the meal in mind. Try a little on a bite of the food you plan to serve it with. Plain roasted vegetables and already-salted grains may need different amounts of seasoning.
- Adjust the lemon. If you want more tang, stir in another ½ teaspoon lemon juice and taste again. If you mainly want a stronger lemon aroma, add a small pinch of zest instead.
- Choose the consistency. Leave it as it is for a dollop. For a drizzle, stir in 1 teaspoon water, lift the spoon and check how it falls. Repeat only as needed.
- Serve or chill. Use straight away, or cover and refrigerate until the meal is ready. Stir again before serving.
What the finished sauce should look like
For a dip, the sauce should sit on a spoon and cling to a piece of vegetable. For a finishing drizzle, it should fall in a slow ribbon. It does not need to run like a bottled salad dressing.
A smaller bowl makes adjustments easier to control. If you double the recipe, keep the water separate and add it gradually rather than doubling an amount that happened to work with a different tub of yogurt.
Common fixes
Too sour
Stir in more plain yogurt a tablespoon at a time, then reassess the salt. Do not keep adding lemon to fix a flavour that is already sharp. For the next batch, start with less juice, especially if the yogurt itself is quite tart.
Too thin
Fold in a little more thick Greek yogurt. Adding extra oil will change the flavour and will not reliably turn a runny sauce into a thick dip. If you only need a dressing, use the thinner batch as it is rather than trying to force it back.
Too thick
Add cold water a teaspoon at a time. Use more lemon juice only when you also want more acidity. This keeps the consistency adjustment separate from the flavour adjustment.
Too salty
Add more unseasoned yogurt and a little zest if needed. Different salts occupy different amounts of space, which is why this recipe specifies fine salt. Start cautiously when substituting coarse crystals.
Serve it with vegetables or grains
Put a spoonful beside roasted cauliflower and carrots, or drizzle it over a bowl of pearl couscous and vegetables. Add it at serving time so the vegetables keep more of their texture.
A tablespoon of finely chopped washed parsley or dill can make a herb variation. Keep the first batch plain if you want to learn how the lemon and yogurt balance. For a different dairy-free option, Fnbbuzz’s white bean dip without tahini is a separate recipe, not a direct yogurt swap.
Keep the sauce cold
Make this small batch for the meal when possible. For advance preparation, keep it covered at 40°F (4°C) or below and plan to use it within 2 days as a conservative household limit, or sooner if the yogurt label requires it. Mixing sauce does not restart the storage life of an already-open tub.
The FDA’s guidance for refrigerated foods sets a two-hour room-temperature limit, reduced to one hour above 90°F (32°C). Serve a small amount and keep the rest refrigerated. Use a clean spoon; do not return sauce from used plates to the storage bowl.
This is a cold finishing sauce. Spoon it onto the plated meal rather than boiling it in a skillet. If a little liquid separates during safe refrigerated storage, stir before serving; appearance alone cannot establish food safety.
Featured image: AI-generated serving illustration, not a photograph of a tested recipe.