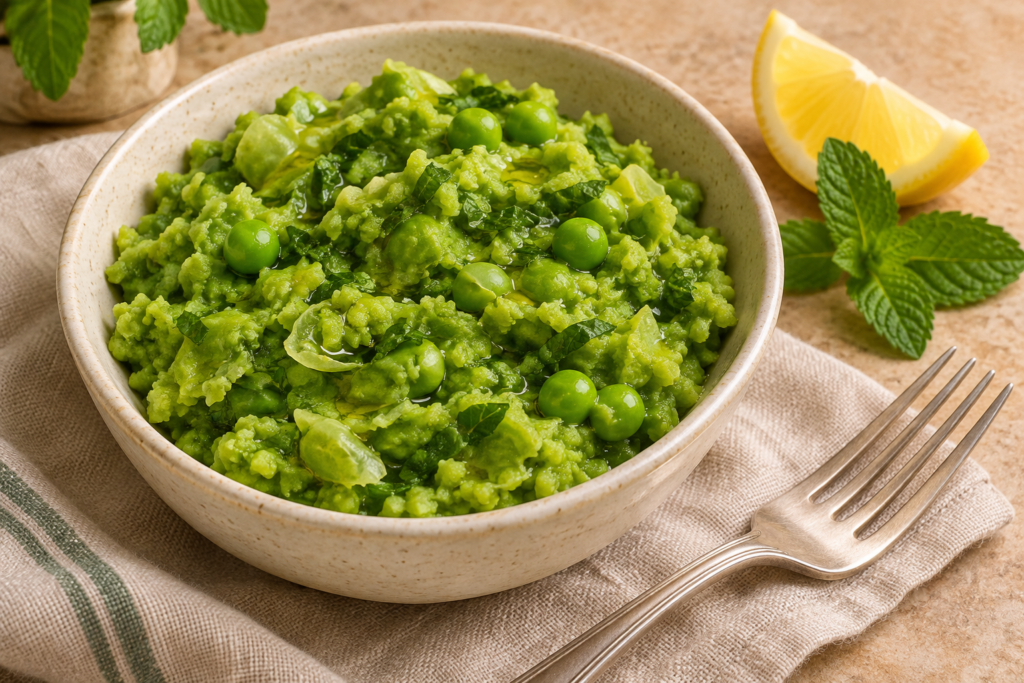
For mashed frozen peas with mint, cook the peas fully according to their packet, drain well and crush them while hot with olive oil. Stir in finely chopped mint and a little lemon juice just before serving. A fork makes a rough mash; a potato masher makes the job easier.
This small side is handy when dinner needs a vegetable and there is already a bag of peas in the freezer. It needs no cream, no stock and no blender. Leave some peas partly intact if you enjoy a bit of texture.
Recipe development note: this original recipe has not been independently kitchen-tested. Timings and yield are estimates. Follow the cooking instructions for your particular frozen peas before using the mashing steps.
Ingredients for a small batch
- 250 g plain frozen garden peas
- 2 teaspoons olive oil
- 1 tablespoon finely chopped fresh mint leaves, plus a little more only if wanted
- ½ teaspoon lemon juice, then adjust to taste
- ⅛ teaspoon fine salt, optional or to taste
- A small pinch of black pepper
- Hot drinking water, 1 teaspoon at a time, only if the mash needs loosening
Estimated yield: 2–3 side portions. Estimated prep and mashing: 5–8 minutes, plus the packet’s cooking time and time to heat the water. A rough total of 10–20 minutes is a planning range, not a guarantee. Use a saucepan, sieve, bowl and fork or potato masher.
Choose plain peas rather than peas packed in butter or sauce. Their seasoning and liquid would change the result. This recipe is for frozen green peas, not dried peas; do not apply its short preparation method to dried legumes.
Cook the peas before mashing
Frozen does not mean ready to eat. The Food Standards Agency advises thoroughly cooking frozen vegetables and following package instructions, including when you plan to eat them cold later.
As one product example, Birds Eye Garden Peas are cooked straight from frozen. Its boiling directions say to cover with sufficient boiling water, return to the boil, then cover and simmer for 3 minutes. That example is not a universal time: use the current directions on your own bag and ensure the peas are piping hot.
Microwaving is fine when the packet supplies that method. Match its quantity, power, water, covering and any standing instructions. Do not simply thaw the peas in a bowl and move straight to the fork.
Make the mash
- Prepare the mint and lemon. Wash the fresh produce under running water, dry it and chop the mint leaves finely. Use clean hands and utensils. The FDA’s produce-cleaning guidance recommends plain running water rather than soap.
- Cook fully. Prepare the frozen peas according to the packet. Once cooked, test a cooled pea for texture. It should crush readily; if still firm, continue cooking until tender without shortening the required cooking step.
- Drain thoroughly. Tip into a sieve and let the visible water drain away. Transfer to a heatproof bowl. Do not add water automatically.
- Crush while hot. Add the olive oil and press with a fork against the bottom of the bowl, working in small sections. A potato masher is useful if the peas keep rolling away.
- Season at the end. Stir in the mint, ½ teaspoon lemon juice and pepper. Taste a cooled spoonful before adding salt, more mint or another small squeeze of lemon.
- Adjust only if needed. If dry and crumbly, mix in hot water a teaspoon at a time. Stop when the mash holds together on a spoon, then serve.
What texture should you expect?
Fork-mashed peas are not silky. Small pieces of skin and a few whole peas are part of the result. They should sit in a soft mound without leaving a puddle around the edge.
If you prefer a smoother texture, use a potato masher more thoroughly. A blender can make a purée, but a small batch may need extra liquid to move around the blades. Only process hot food in equipment designed for that use and follow its venting and fill instructions. A fork is the simpler choice here.
Quick fixes
The mash is watery
Drain any visible free liquid before adding more seasoning. If needed, return the cooked peas to the pan over low heat and stir briefly to evaporate moisture. Add the fresh mint after this step so it is not cooked longer than necessary.
The peas will not crush
If the centres are firm, they need more cooking. If they are tender but slippery, use a flatter bowl and press a few at a time instead of chasing them around a deep saucepan. More oil is not a substitute for tenderness.
The mint takes over
Fold in more cooked, drained peas if available. Next time, start with half the mint and build up. Leaf size and strength vary, so a measured amount is a starting point rather than a reason to ignore the taste.
The lemon is too sharp
Add more plain cooked peas. Avoid repeatedly adding salt to compensate for excess acid. The lemon should brighten the peas without becoming the main flavour.
Serving ideas
Serve the mash beside roasted cauliflower and carrots with bread or your preferred main dish. It also works as a warm spread on toast, though a thinner mash will soften the bread quickly.
For another freezer vegetable on a different evening, try sautéed frozen green beans. That recipe has its own moisture-management method; peas and beans should each follow their package cooking directions.
Leftovers
Use a shallow covered container and refrigerate promptly at 40°F (4°C) or below. Use within 3–4 days. The USDA’s leftover limits are two hours out of refrigeration, or one hour above 90°F (32°C).
Reheat just the portion needed, adding a little water if it has stiffened. Stir and check with a thermometer: reheated leftovers should reach at least 165°F (74°C). The colour and mint flavour may be less fresh after reheating.
Featured image: AI-generated serving illustration, not a photograph of a tested recipe.