Roasted Cauliflower and Carrots- A Simple Weeknight Side Dish
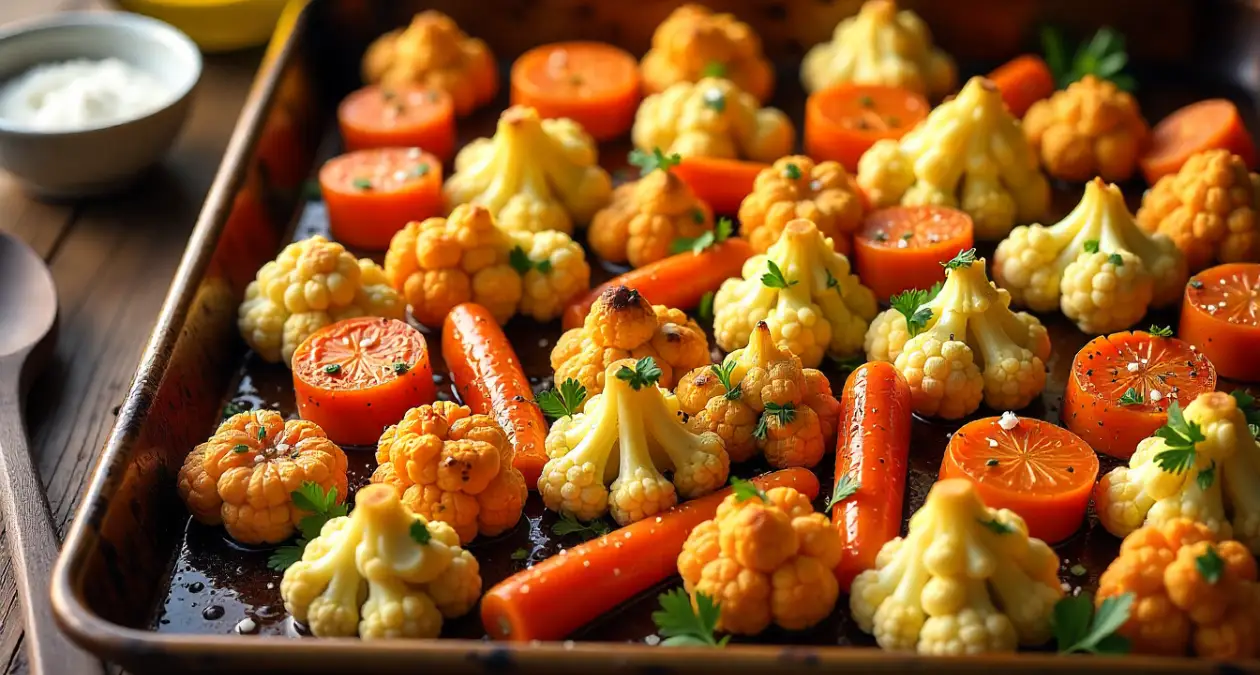
Table of Contents
Everyone needs a go-to side that’s easy, healthy, and actually tastes like something you’d pay for at a restaurant. Enter Roasted Cauliflower and Carrots — a humble duo that transforms with heat, salt, and a little oil into golden, sweet, slightly-charred deliciousness. Ready in about 30–40 minutes, it’s my favorite shortcut to make any weeknight meal feel like an occasion.
Why You’ll Love This Side
Why should you roast instead of steam? Because roasting does two magical things: it concentrates sweetness and creates crispy edges. That means your Roasted Cauliflower and Carrots come out with nutty, caramel notes and a satisfying texture contrast — tender inside, crisp outside. Want something versatile? This side works for casual dinners, holiday spreads, or meal-prep bowls.
Ingredients You Need
Simple pantry items. Bright results.
Fresh Vegetables
- 1 medium head cauliflower (cut into florets)
- 4–5 large carrots (peeled and cut into sticks or coins)
Use fresh, firm carrots and a tight-headed cauliflower for the best texture.
Oils, Herbs, and Spices
- 3 tbsp olive oil (or avocado oil)
- 1 tsp kosher salt (adjust to taste)
- ½ tsp black pepper
- 1 tsp garlic powder or 2 cloves fresh garlic, minced
- 1 tsp smoked paprika (optional, for depth)
Optional Add-ins for Texture and Flavor
- A squeeze of lemon or 1 tsp lemon zest (brightens the dish)
- 2 tbsp chopped parsley or cilantro (freshness)
- 2 tbsp grated Parmesan or nutritional yeast (umami)
- A handful of toasted nuts (almonds, pine nuts) for crunch
Equipment and Prep Tips
No fancy gear needed — but a few small choices make a big difference.
Best Pan or Sheet to Use
Use a large rimmed baking sheet — a single layer is key. Crowding traps steam and prevents browning. If you must use two pans, rotate them halfway through.
How to Cut Cauliflower and Carrots for Even Roasting
Cut cauliflower florets similar in size (about 1–1.5 inches). Slice carrots into equal-thickness sticks or 1/4-inch rounds so everything cooks at the same pace. Think uniform pieces = even roasting.
Step-by-Step Recipe
Now the fun — real, hands-on steps for perfect Roasted Cauliflower and Carrots.
Step 1: Preheat and Prep
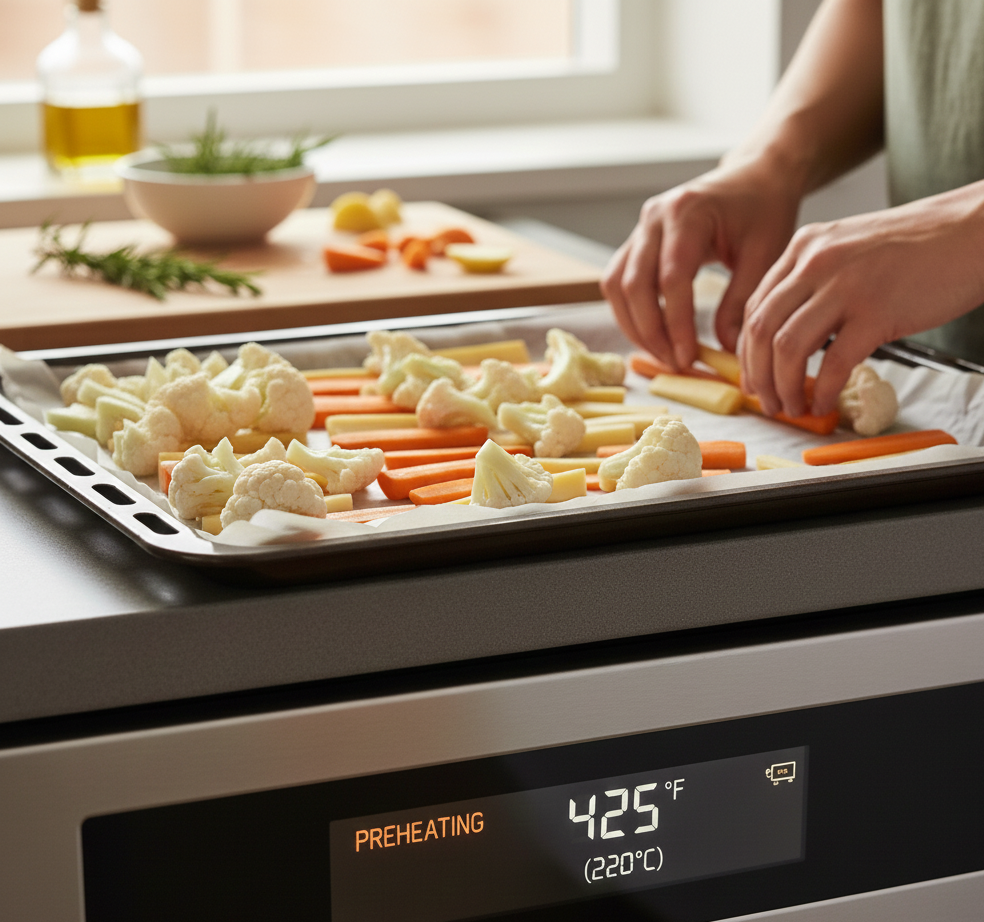
Preheat oven to 425°F (220°C). High heat is crucial for caramelization. Line the baking sheet with parchment if you want easier cleanup, but don’t crowd the veggies.
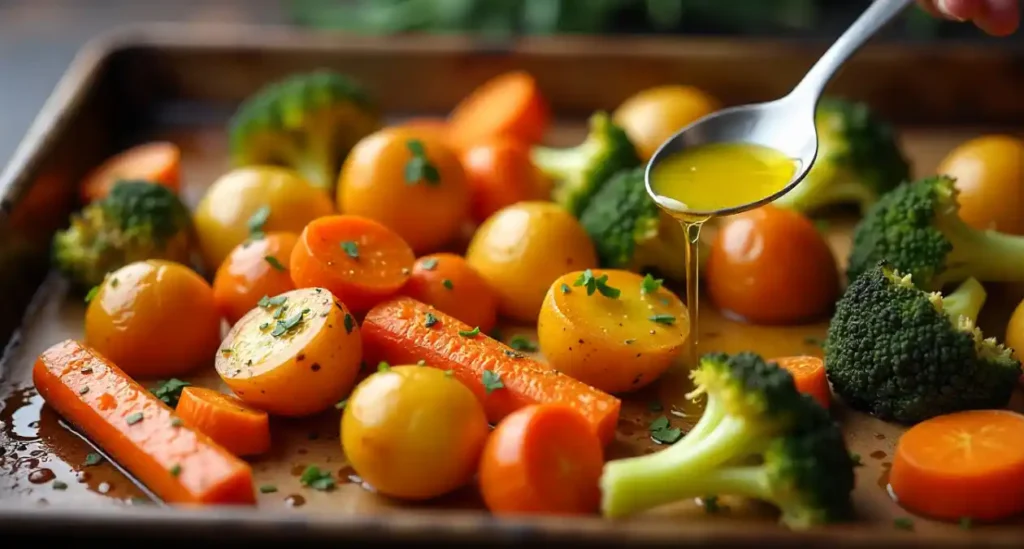
Step 2: Seasoning and Tossing
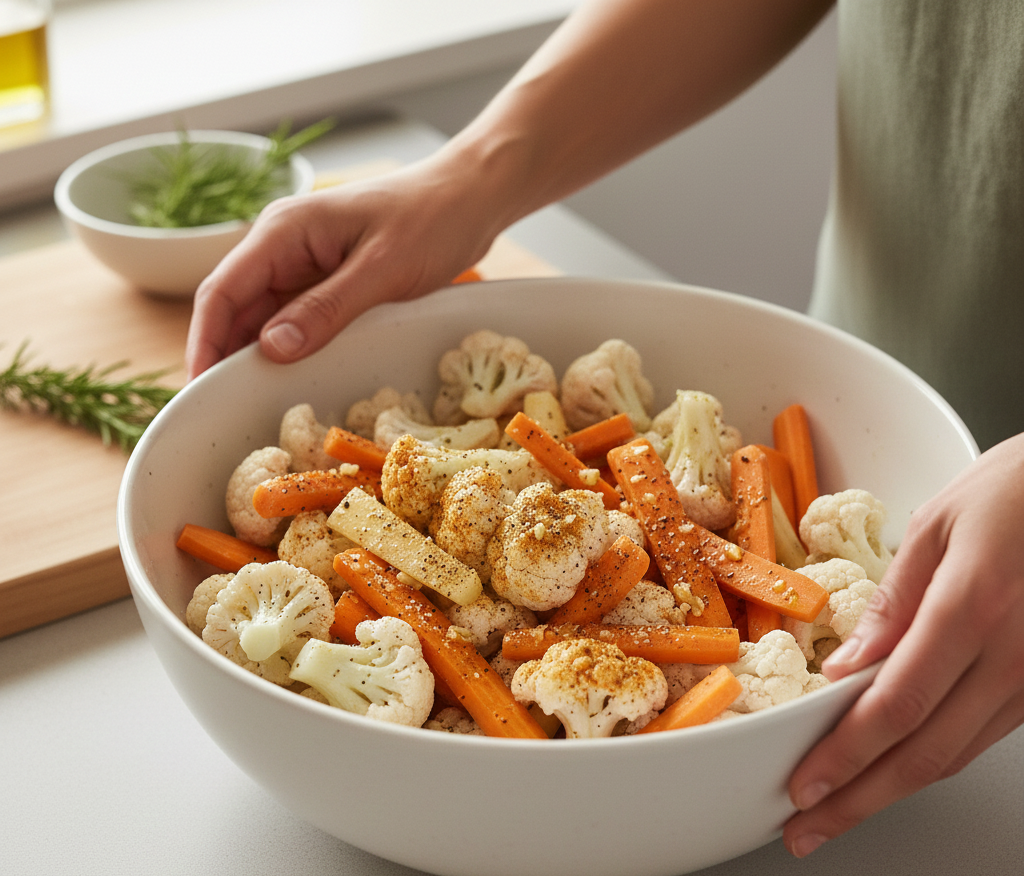
In a large bowl, toss cauliflower and carrots with oil, salt, pepper, garlic, and smoked paprika. Make sure every piece is lightly coated — that thin film of oil helps browning and prevents sticking.
Step 3: Roast Time and Temperature
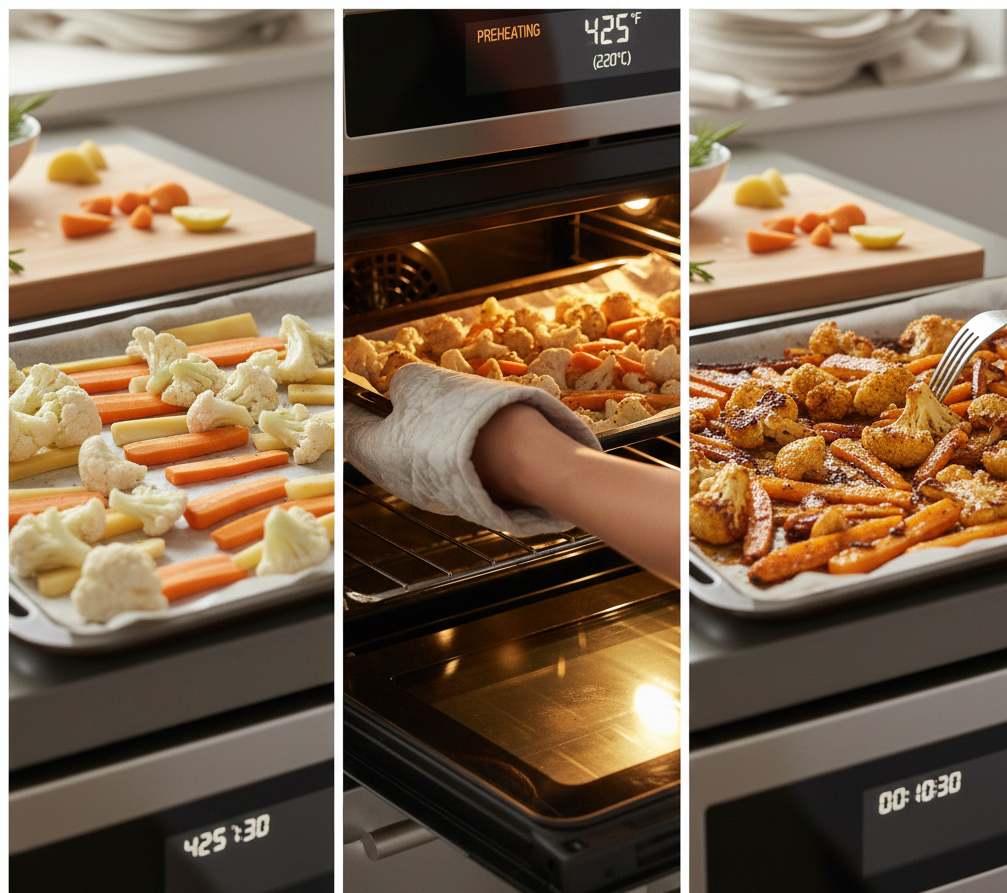
Spread vegetables in a single layer on the sheet. Roast for 20–30 minutes, flipping or shaking the pan halfway. Watch the edges — you want golden-brown caramelized bits, not black burned spots. Depending on your oven and size of pieces, test for tenderness with a fork at 20 minutes.
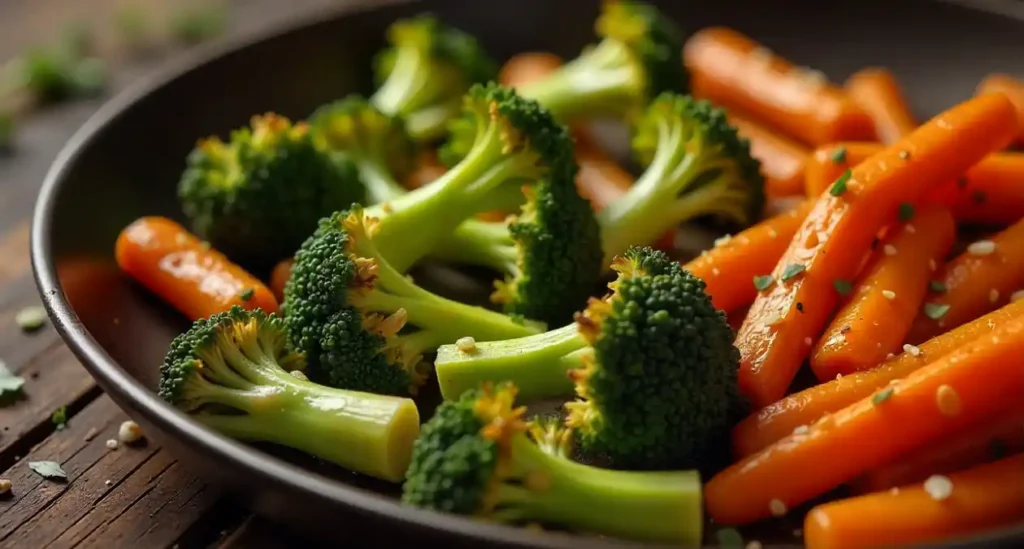
Step 4: Finishing Touches


Remove from oven. Immediately squeeze a little lemon over the hot veggies, sprinkle herbs, and add grated Parmesan or toasted nuts if using. Serve hot.
Flavor Variations
Want to switch things up? Here are tasty riffs that keep the core technique.
Mediterranean Twist
Toss roasted Cauliflower and Carrots with 1 tbsp olive oil, 2 tbsp crumbled feta, 1 tbsp capers, and chopped kalamata olives. Finish with oregano and lemon. Think sunshine and tang.
Spicy-Sweet Glaze
Mix 1 tbsp honey, 1 tbsp soy sauce, and 1 tsp chili flakes. Brush over the vegetables in the last 5 minutes of roasting for sticky, spicy-sweet glaze.
Asian-Inspired Soy-Ginger
After roasting, toss veggies with a sauce made of 1 tbsp soy sauce, 1 tsp rice vinegar, 1 tsp sesame oil, and 1 tsp grated ginger. Garnish with sesame seeds.
Make-Ahead and Storage
This dish is surprisingly good for meal prep.
How to Reheat Without Losing Crispness
Reheat in a 400°F oven for 6–8 minutes to revive edges. Microwave will make them soggy; if you must microwave, then blast on high for 30–45 seconds and place under the broiler for 1–2 minutes.
Freezing Tips (if any)
Roasted veggies lose texture in the freezer. If you want to freeze, flash-freeze on a sheet first, then transfer to a bag. Reheat in the oven at 425°F until hot. Expect softer texture.
Pairing Suggestions
Where does Roasted Cauliflower and Carrots shine? Almost everywhere.
Proteins That Match Well
- Roast chicken or grilled salmon — the veggies cut through richness.
- Chickpea bowls or lentil stews — add roasted veggies for depth.
- Pork chops or steak — they add sweet balance.
Grains, Salads, and Sauces
Serve over warm quinoa, farro, or rice. Toss with leafy greens for a warm salad. Drizzle tahini or yogurt sauce for creaminess.
Nutrition Snapshot
Roasting keeps nutrients while enhancing flavor.
Key Vitamins and Fiber
Cauliflower is rich in vitamin C and choline; carrots bring vitamin A, beta-carotene, and fiber. Together, Roasted Cauliflower and Carrots provide a nutrient-dense, low-calorie side that fills you up.
Why Roasting Is Healthy
Roasting uses minimal oil and brings out natural sugars — so you get satisfying flavor without added sugar. Use healthy oils (olive, avocado) for heart-friendly fats.
Common Mistakes and How to Fix Them
Don’t let small errors ruin dinner.
- Crowding the pan — fix: use two sheets or roast in batches.
- Pieces are uneven — fix: cut intentionally; smaller pieces roast faster.
- Veggies are limp — fix: roast at higher temp and reduce oil.
- Burned edges — fix: lower temp 25°F and extend time; keep an eye.
Serving Ideas and Presentation
Small touches make it feel special.
- Serve in a warmed shallow bowl.
- Add a sprinkle of fresh herbs and lemon zest right before serving.
- For a cozy family meal, place the tray on the table and let everyone help themselves — rustic and charming.
Budget and Time-Saving Hacks
- Use frozen cauliflower florets if you’re rushed — thaw and pat dry to avoid sogginess.
- Save carrot peels and cauliflower stems for stock.
- Double the recipe and use leftovers in grain bowls or blended into soups.
You’ll find full FAQs at the end, but quick answers: roast high, cut evenly, don’t crowd — those three rules cover most issues with Roasted Cauliflower and Carrots.
Conclusion
Roasted Cauliflower and Carrots is the perfect weeknight side dish: simple, flexible, and full of flavor. With a few pantry staples and a hot oven, you get a nutritious, crowd-pleasing dish that pairs with many mains. Try the variations, keep the roasting rules in mind, and you’ll have a new favorite that’s effortless to make and impressively delicious to eat.
FAQs
1. Can I roast frozen cauliflower and carrots for this recipe?
Yes, but with caution. Thaw frozen cauliflower and carrots completely and pat dry to remove excess moisture. Too much water will steam instead of roast, preventing browning. Toss with oil and roast at 425°F, but expect a slightly softer texture.
2. How do I make this dish more kid-friendly?
Mild seasoning works best for kids. Skip the smoked paprika and chili. Add a tiny drizzle of honey or maple syrup before serving — kids often love the sweet caramelized flavor.
3. How long will leftover roasted cauliflower and carrots keep in the fridge?
Stored in an airtight container, they keep for 3–4 days. Reheat in a hot oven to revive crispness. Avoid microwave reheating if you want to keep texture.
4. Can I add other vegetables with the cauliflower and carrots?
Absolutely. Brussels sprouts, red onion wedges, sweet potato cubes, and bell peppers roast well. Keep similar-sized pieces together or roast different shapes on separate pans to ensure even cooking.
5. Is this recipe suitable for a low-carb or keto diet?
Yes. Cauliflower is low in carbs and fits well in keto and low-carb diets. Carrots have more carbs than cauliflower but in moderate portions they can still fit a low-carb meal plan. Adjust portions depending on your macros.
Related Posts
Easy Roasted Potatoes Carrots and Broccoli Recipe

How to Make Crispy Roasted Potatoes and Zucchini at Home
This roasted cauliflower and carrots recipe is so simple yet full of flavor. I love how easy it is to prepare on busy days. Definitely trying it this week!
thankyou so much.. I am glad you liked it!
Tried a similar version before, but this one looks even better. I like how you explained the roasting tips—it really helps get that perfect texture. Great post!
Thank you! Happy to hear the roasting tips were helpful. Getting that perfect texture makes all the difference. Hope this version turns out even better for you!